
UX Zoning: Definition, Examples, Figma & Wireframes

When people think about building a website, they jump straight to colors, fonts, and visuals. But before any of that, there is a quieter and far more decisive step: UX zoning. This is where you decide what goes where on a page, and this single decision shapes most of the user experience (UX) that follows.
In this article, we cover what zoning is in UX design, why it matters more than most people think, and how it connects to the next steps: wireframing, mockup, and development.
What is UX zoning in web design?
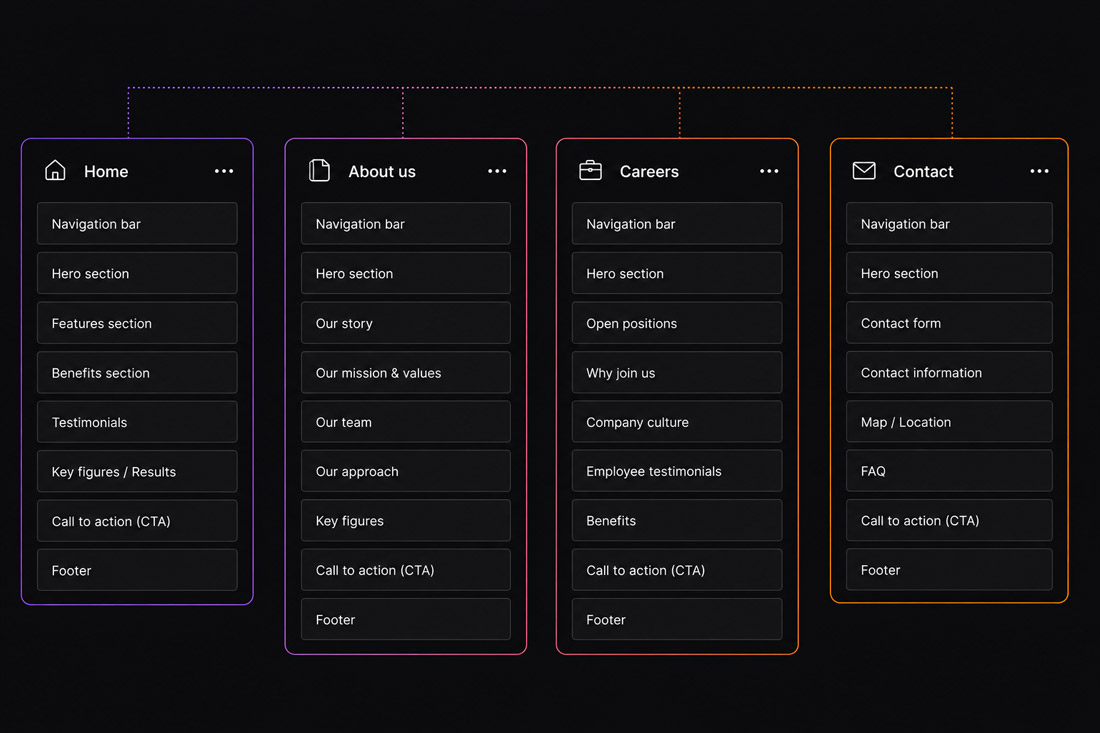
Zoning, also called low-fidelity wireframing in many UX workflows, is the step where a page gets divided into functional blocks before any content, visual design, or code is involved. Each block has a specific role: the header, the hero section, social proof, value proposition, calls to action, the footer. You work at block level, not pixel level. In practice, you draw labeled rectangles, on paper or in a tool like Figma, to define the page structure in its most essential form.
A useful analogy: zoning is like the floor plan of a house before choosing the furniture and colors. You decide where the kitchen goes, where the bedroom is, how the living room connects to the rest, based on how people will actually live in the space. The furniture comes only after.
Zoning and wireframing are not the same thing. Zoning is more abstract: it answers the question “which blocks are needed and in what order?”. Wireframing then goes further and defines “how each block is built”.
Why zoning is essential for UX
Skipping zoning is one of the most expensive mistakes in interface design. Here is why this step makes the difference.
1. It defines hierarchy and the user journey
Zoning sets the order in which users encounter information and guides their attention toward the action that actually matters. A clear hierarchy means someone understands within seconds where they are, what they can do, and why they should do it.
2. It reduces costs and errors
Moving a rectangle during zoning costs nothing. Rebuilding a page that is already in development costs days of work. Thinking through structure early avoids heavy revisions in later phases, where every change becomes slower and more expensive.
3. It separates function from aesthetics
Without the distraction of colors, images, and typography, zoning forces you to think in terms of goals and priorities. This is the moment to ask: “Is this block actually useful? Is it in the right place for what we are trying to achieve?” A question that becomes much harder to ask once you are already attached to a visual direction.
4. It works across every device and interface
Zoning is not just for websites. Mobile apps, dashboards, SaaS platforms, interactive kiosks: every interface needs a structure defined before the visual design begins. It is also the ideal moment to think mobile first, deciding which content is prioritized on small screens and how blocks reorganize across breakpoints.
5. It aligns teams and clients
Zoning is a shared language for discussing page structure without getting lost in design details. It helps designers, developers, and clients agree on the skeleton before investing time and energy into actual design work, which is especially valuable when working with remote teams across different countries and time zones.
How to create UX zoning, in practice
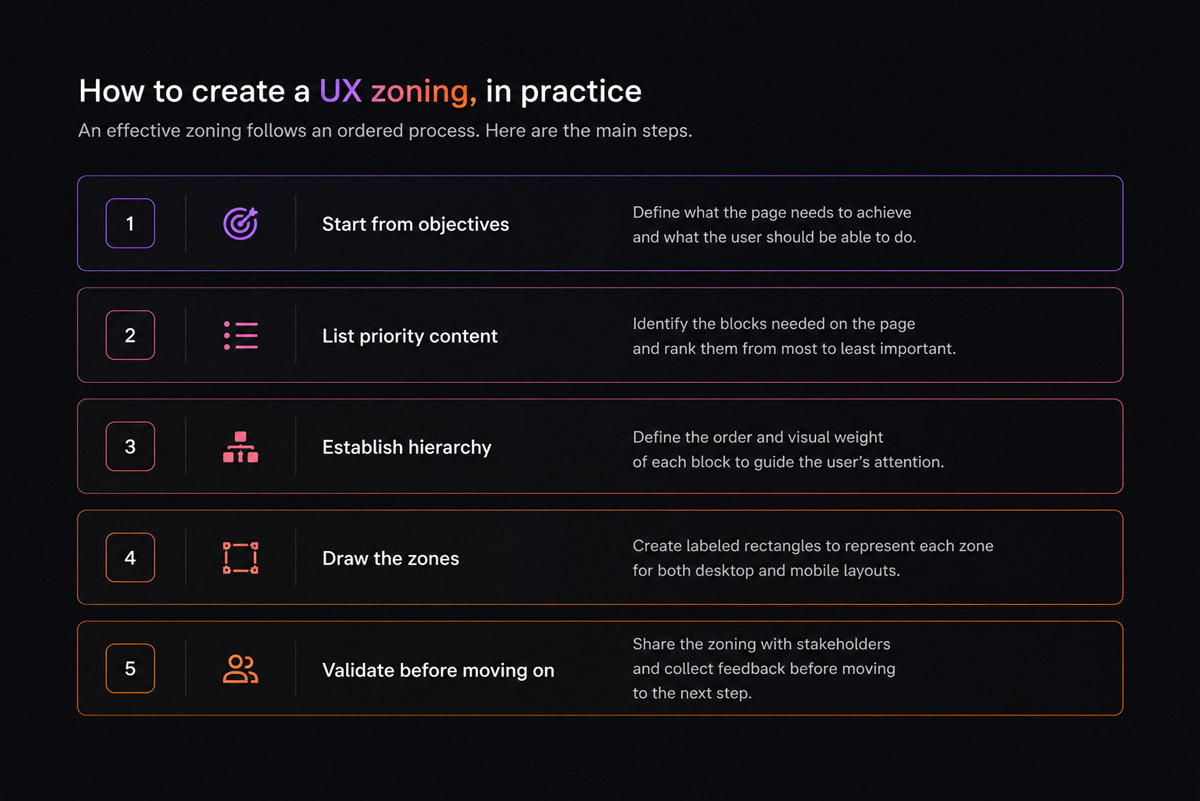
An effective zoning follows an ordered process. Here are the main steps.
- Start from objectives: what the page needs to achieve and what the user should be able to do.
- List priority content: the blocks needed, ranked from most to least important.
- Establish hierarchy: define the order and visual weight of each block.
- Draw the zones: labeled rectangles for both desktop and mobile layouts.
- Validate before moving on: share the zoning with stakeholders and collect feedback before progressing to the next step.
One golden rule: every screen should have one clear primary objective. If a page tries to do everything at once, the zoning phase is exactly where that problem becomes visible.
As a freelance UX designer working remotely across Europe, I apply this step on every project, whether it is a brand website, a SaaS product, or a full redesign. It is often the phase clients remember most: deceptively simple on the surface, it locks in strategic decisions that shape everything that follows.
How to choose the right blocks for a page
UX zoning is not about stacking standard sections such as Hero, Services, Testimonials, and CTA. Every block should perform a specific function in the journey. To decide whether it deserves a place, ask what the user needs to understand at that moment, which objection may still be holding them back, what proof could increase confidence, and what action should come next. A section that answers none of these questions is often unnecessary.
The structure therefore changes with the purpose of the page. A homepage needs to orient visitors and communicate the value proposition quickly, a service page needs to explain, reassure, and convert, while a landing page should stay focused on one offer and one primary goal. Good zoning is not about adding more sections, it is about organizing just enough information to move the user forward without friction.
“For remote work or direct client collaboration, FigJam is particularly well suited.”
AI as a brainstorming tool for UX zoning
Before drawing the first rectangle, there is a thinking phase: which blocks are actually needed? In what order? With what priority? This is where AI becomes a genuinely useful tool. By describing to a model like ChatGPT or Claude the goal of the page, the target audience, and the industry context, you can quickly generate suggested blocks, questions you may not have considered, or alternative structures worth comparing.
AI does not do the zoning: the designer decides, validates, and adapts. But the brainstorming becomes faster, more structured, and often more complete. In my freelance practice, I use AI as a first sparring partner to challenge my instincts before placing the first block in Figma.
Zoning in a real project: Corset Roche et Associés
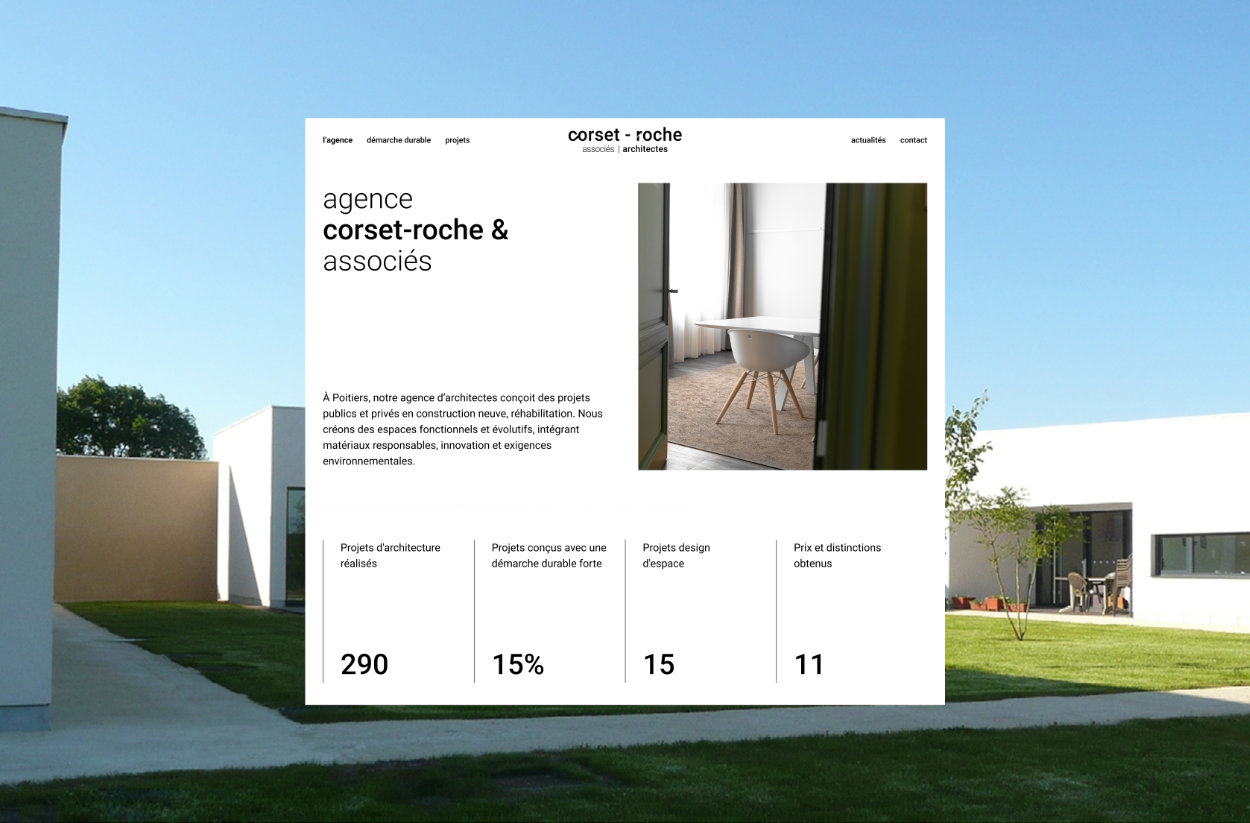
To see this method applied in practice, explore the Corset Roche et Associés project, an architecture firm for which I completed the zoning phase before moving to wireframing and the final mockup. It is a concrete example of how a well-structured foundation upstream simplifies every step that follows and delivers a coherent result without unnecessary back-and-forth.
Common UX zoning mistakes
The most common mistake is starting by copying the structure of a competitor or reference website without checking whether it actually fits the project. Other recurring problems include trying to fit every stakeholder request onto one page, giving every section the same importance, multiplying calls to action, or adding blocks simply because they have become familiar visual conventions.
Another trap is designing the zoning for desktop first and then simply compressing it for mobile. Good responsive zoning may require changing the order of information, shortening secondary content, or making an action more prominent on a small screen. Zoning should remain a prioritization tool: every decision needs to be justified by the page objective and the user's needs, not just by aesthetics or habit.
After zoning: wireframing, mockup, and development
UX zoning comes right after the sitemap is defined, once the site's pages and their relationships have been established. It is the starting point of a structured method: once the block structure is in place, the project moves through three key steps.
📐 Wireframing
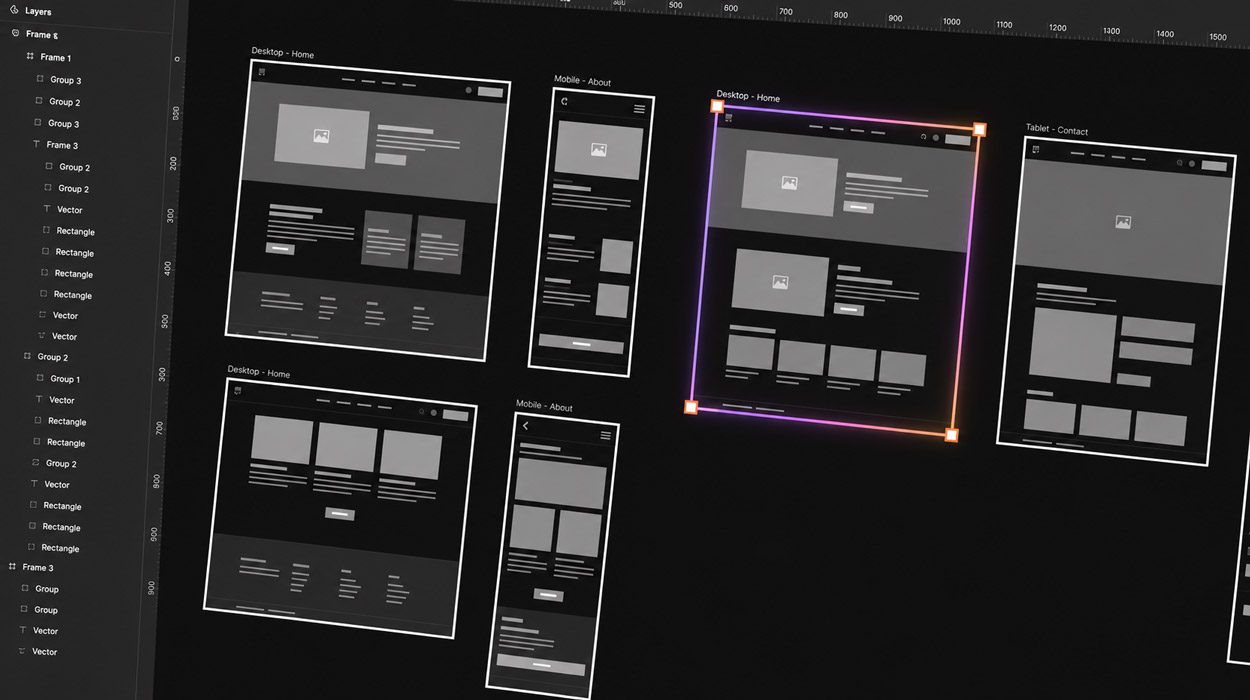
The wireframe translates zones into a concrete structure: the position of headings, text, buttons, and images. You still work in black and white, without final visual design, but you start defining spacing, relative dimensions, and component behavior. It is the bridge between the abstract idea of zoning and actual design. For both zoning and wireframing, I work in Figma: it allows fast iteration, easy client sharing, and consistency across the entire project, which matters especially when collaborating remotely.
🎨 Mockup
The mockup is the high-fidelity version: colors, typography, images, and brand identity. The design comes to life and approaches the final look. Mockups are often paired with an interactive prototype, useful for testing user flows and ergonomics before writing a single line of code.
⚙️ Development
This is where design becomes a real, functional website, for example in Webflow. A solid zoning foundation makes development faster and cleaner because the structure is already clear, considered, and validated. Starting development without zoning, on the other hand, often leads to confused pages, costly revisions, and timelines that grow out of control.
Conclusion
Zoning is the invisible foundation of good UX. You never see it in the finished website, but when it is done well, you feel it in every interaction: users immediately know where to look, what to do, and where to click. Investing in this step means building interfaces that are clearer, more effective, and less expensive to produce.
A well-thought-out zoning is also conversion-focused work: where the contact form goes, where testimonials appear, and how CTAs are prioritized are all decided here, before any design work begins.
Working on a website or digital product and want to start on solid structural ground? Explore my UX Design service or get in touch to talk through your project.
FAQ
What is UX zoning in web design?
UX zoning is the early design stage where a web page is divided into large functional areas before visual design or final content is created. It usually comes after the sitemap, project goals and user needs have been defined, and before detailed wireframing. Typical zones include the header, hero, main content, social proof, calls to action and footer. The purpose is to establish the page hierarchy and user journey while the structure is still quick and inexpensive to change.
What is the difference between UX zoning and a wireframe?
UX zoning defines the major sections of a page and their order at a very abstract level. A wireframe is the next step: it defines what happens inside those sections, including the placement of headings, text, images, buttons and other interface elements. Zoning establishes the macro structure, while wireframing turns that structure into a more concrete page layout before visual design begins.
Is UX zoning necessary for a simple brochure site?
Yes, even for a brochure site with just a few pages, zoning brings real value. It forces you to think about the order of information, the position of the main CTA, the balance between content and white space, and the consistency between different pages, all before investing time in design. On a small project, zoning takes 1 to 2 hours and can prevent costly revision cycles during design and development.
How do you create UX zoning in Figma?
In Figma, start with a frame for each page or screen and represent the main sections using simple rectangles and short labels such as Header, Hero, Services, Social Proof, CTA and Footer. Avoid visual styling at this stage so the focus stays on hierarchy, order and the role of each section. FigJam can be useful for a looser collaborative first pass before formalising the zoning in Figma and moving on to wireframes.
How can UX zoning support SEO?
UX zoning can support SEO indirectly by giving important content a clear place in the page structure before visual design begins. It helps establish a logical heading hierarchy, ensures key information is not buried too deep in the layout, creates room for useful internal links and makes it easier to organise content around search intent. The SEO benefit comes from clearer information architecture and more usable pages rather than from zoning itself being a ranking factor.


